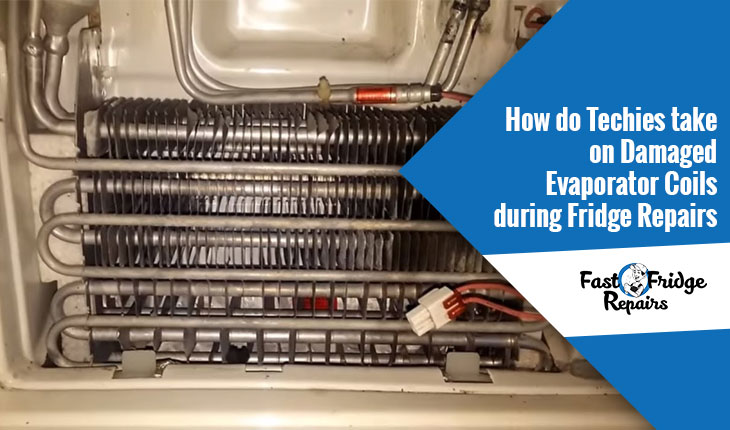
A very common problem that compels households to book service calls for fridge repairs in Ashfield like in any other place is damaged evaporator coils. This is an extremely intimidating issue and needs to be addressed and amended at the earliest. Thus, when it comes to addressing damaged or faulty evaporator coils, the best fridge repairing company needs to be summoned. When you have Fast Fridge Repairs around, there is nothing to worry though. Our techies are experienced enough to provide the most effective solutions when it comes to repairing damaged or faulty evaporator coils.
Here are the steps that our technicians would generally take to repair a damaged evaporator coil.

Step 1: Starting off
The first and foremost step is removing the panel that covers the coil. The panel is located in the freezer compartment and can be opened with the help of a suitable screwdriver or a ¼ inch nut driver. These two are the most suitable tools to take the holding screws off.
Step 2: Removing the Hold-Down Clamps
This is the second step, wherein the techies get rid of the hold-down clamps that encompass the coil. Again, they use either a screwdriver or a ¼ inch nut driver for that. The function of these hold-down clamps is to prevent the coil from shuddering when the fridge runs. The clamps are screwed directly to the body of the refrigerator and need to be removed to get access to the evaporator coils.
Step 3: Looking for the Leaks and Faults
Now that the panel and the clamps are removed, the coil is exposed and it is time to look for the leaks and faults. The seasoned eyes of the techies would scan the coil for rubbed areas and oily spots, and areas that are heavily oxidised. They would pay extra attention to the kinks and the bends in the tubing of the coil. The reason is pretty obvious – these bends have a propensity of rupturing over time due to their structural intricacy.
Step 4: Cleaning the Leaked Area(s)
This is the most vital step of the entire episode of work. Now that the leaking area(s) has/have been spotted, it/they need(s) to be cleaned thoroughly. The techies would use sand paper to do so. The technicians would remove even the last pieces of loose materials and debris with the help of sandpapers. They would pay particular attention to see off the refrigerant oil. However, they would do so intricately, so much so that the debris does not get into the leaks or the hole of the tube. Once done, they would wipe off all the sanding dust from the leak area using a clean rag.
Step 5: Getting into further Details
Things get more intricate during this stage of the fridge evaporator coil repairs in Mosman and Ultimo. The pros would connect a vacuum pump to the refrigerant service valve of the fridge. The valve is located close to the compressor and it appears as an over-sized tyre valve with the only difference being, it is metallic. The technicians would generally use a hand-held automotive pump to connect.
Step 6: Creating the Vacuum
Now, they will draw a vacuum using the vacuum pump. Generally, a vacuum of 10 inches of mercury is drawn. Now if there are significant leaks in the tube, they will not let this happen. A vacuum will draw the patch into the ruptured area, forming a bond.
Step 7: Fixing the Leak
This step involves kneading about an inch section of epoxy putty with the hands. They using continue mixing the putty until the mixture becomes uniform in texture and colour. Once done, they would press the putty firmly over the ruptured area, wrapping the mixture properly around the pipe. Ideally, the patch would extend about an inch or two on either side of the leak to be on the safer side. They do it pretty fast- and finish applying the putty within a couple of minutes of forming the mixture. This is done to ensure that the mixture does not become hard before applying.
Step 8: Checking the Vacuum Gauge
Once the mixture is applied and it hardens over the leaking area, the vacuum gauge is checked. Now again, a 10-inch mercury vacuum is drawn on the refrigerant system and then the vacuum pump is disconnected.
Step 9: Following up
Finally, the vacuum reading is checked again after 24 hours. If the vacuum reading drops again, that denotes that still, leakage persists. Again, the leak test is performed and the necessary repair work is done.
Footnote: If the leak continues to appear even after repeated repair works, then our techies insist replacement of the entire coil altogether.
Therefore, you see, the steps that our techies take for fridge repairs in Ashfield, more so when it comes to repairing evaporator coil are purely technical. Hence, only seasoned and qualified technicians need to be summoned for the task. We pride to say we at Fast Fridge Repairs are home to some of the best and most seasoned technicians who are qualified enough to fix issues like this with flying colours.
For further details and whenever you are in a fix, do not hesitate to call us at 0405972558 between 7.00 am and 7.00 pm. We will be more than glad to fix the issue at the earliest.


